Yesterday was my best friends birthday. Rhian was born on that day a quarter of a century ago. We met during a PE lesson at school thanks to our mutual rubbishness at sport, and our friendship quickly blossomed.
 Rhian is a lovely person, and when it comes to choosing gifts it should be easy. She likes a lot of things. Jewellery is always welcome, along with anything Celtic (she's half welsh and loves Celtic patterns). She has also been a fan of dolphins for as long as I can remember. She is a supporter of Northampton Saints Rugby Team, and is a science geek. A chatterbox and a bookworm (especially for fairy tales). with so much choice, it should be easy. The trouble is that everyone else knows all of the things she likes, and she has a lot of jewellery, a lot of dolphin posters and ornaments, along with funny science posters. She has a Rugby Jersey, and lots of items with Celtic patterns, so how on earth could I choose. Where should I start.
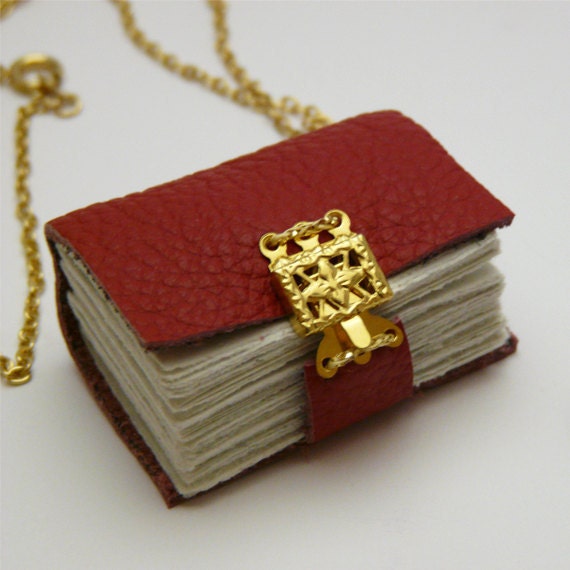
 After some contemplation I searched for 'celtic dolphin' in Etsy. A few pages of gorgeous items were found, but one type in particular caught my eye. It was a necklace with a mini book pendant, with a dolphin on the cover. Perfect. It was a little expensive however, and was pre-printed with a poem. Inspiration had struck however, and after a little more searching I settled on this red leather bound mini book pendant by The Press Gang, it even has a cute little clasp. The pages were blank, so I filled most of them with various quotes and pictures of us and places we'd been. I then carefully packaged it back up, (it had arrived beautifully packaged in brown paper tied with twine, simple and stylish) before hastily posting it along with the card. Considering I didn't post it until Tuesday Afternoon, I was very pleasantly surprised when Rhian texted me the next day to say it had arrived, perfect timing for her birthday!
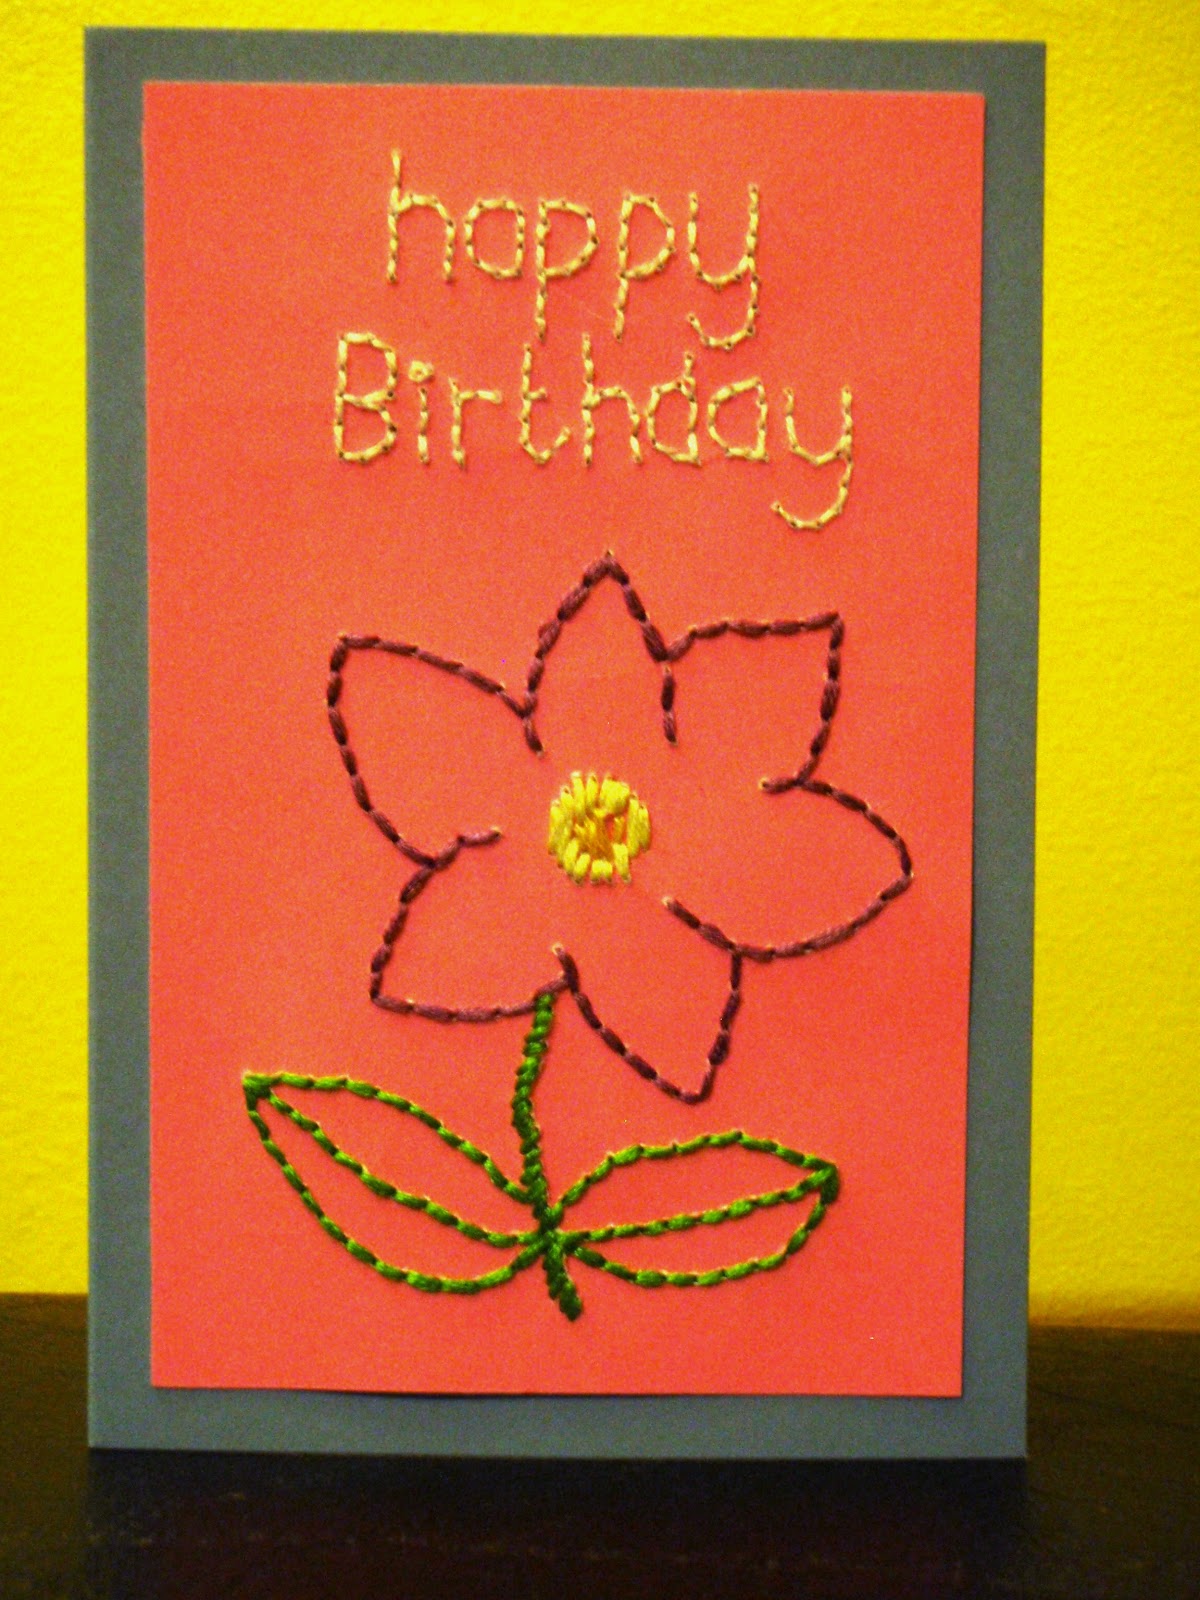
 Designing a card was somewhat easier. I wanted it to be fairly simple, so 'Happy Birthday Rhian' was an easy message to include. I also included small Celtic pattern motif's in the corners. Red had to feature as it's Rhian's favourite colour, and I wanted to outline the Celtic motif in Gold to make them stand out more. However, I wasn't sure what colour to use. Maybe a darker red for contrast, but that could be a bit boring, or maybe purple, her second favourite colour, but I didn't think it would compliment the red. Que Chris, who suggested green when I asked his advice. Perfect. I love the combination of the bright colours, and I think it adds to the Celtic effect. It also made it an easy choice to use yellow card with a red inside, using the same technique as that of the Fathers Day card I made previously. What do you think?
Happy Stitching!
You might also like
Friday Finds: Friends
Spring, Cambridge and Punting
Mothers Day
Friday Finds: Hobbits
Fairy Tale Cross Stitch Kits

.png)


