Showing posts with label card. Show all posts

Friday, 29 November 2013

Free Chart: Wedding Card

My sister Jessica recently got married to her lovely new husband, Danny after 3 1/2 years together. She asked me to be her bridesmaid, which was lovely of her and I really enjoyed it, (despite the stress of helping plan a wedding, and making sure everything runs smoothly. She tied the knot at Brownsover Hall Hotel, which was an absolutely beautiful setting. The whole day was lovely, (although over to quickly). As she's my favouritist sister in the whole wide world (and my only one) there was no question that I wanted to make her a special wedding card for the big day, which, now that it is all over, I am sharing with you!


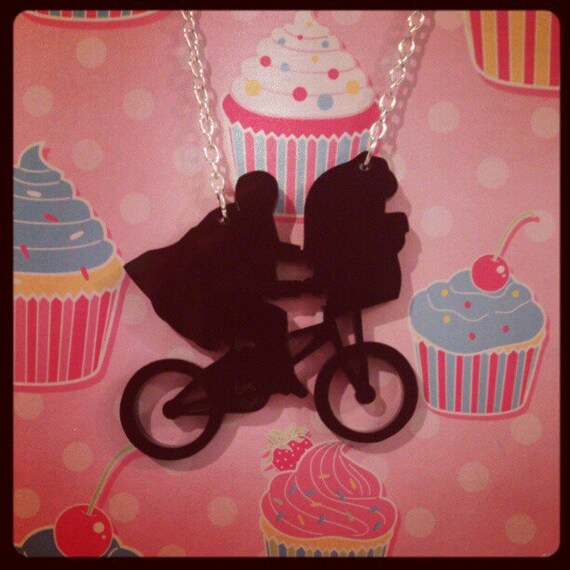
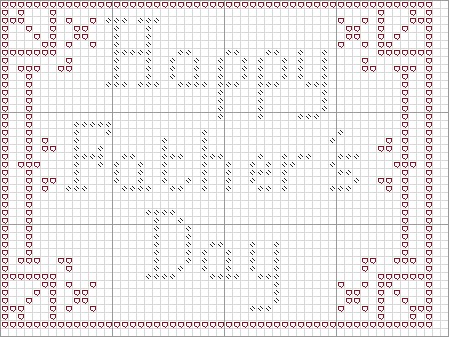
I used a dark red and gold for the heart border, and a sparling champagne coloured thread for the champagne glasses. I sued 1 strand of thread for all the stitching, including the backstitch. I stitched this on a 22 count even weave, which gave a finished size of 10.5cm (4") x 15.5cm (6"), perfect for an A4 card. On 14count aida the finished size is 16cm (6.5") x 24cm (9.5"). For techniques on finishing the card, please see my Project Tutorials page. I used the same technique as I did for the embroidered bicycle card but I used gold card instead, with a pearlised red card border. Unfortunately I don't have a photo of the finished card, I didn't get round to making it until a few days before the wedding!
 
Happy stitching
 
You might also like
 

Friday, 23 August 2013

Friday Finds: New Home

Phew! It's been a busy few weeks since I got back from my holiday (you can read a bit about it on my new travel blog, http://exploragem.blogspot.co.uk/ although I have not had much opportunity to write much about my trip to Andorra and Northern Spain, as things have been pretty hectic because... I've been house hunting! With completion date not yet confirmed (but hopefully just around the corner) and a house mostly devoid of furniture I have been spending my free time searching for advertise and looking around house shares, and I am very happy to say I will be moving tomorrow! The house I'm moving to is lovely, closer to work and close to shops, but most importantly I'll be living with two lovely singles girls about my age, which is great as most of my friends are coupled up, and having been single since my long term relationship ended in January, I'm very much looking forward to making some single friends!
 
The only downside is that packing takes ages, (probably partly because I spent a fair while sorting out my crafting bits and pieces) but I can't wait until it's done and I'm all moved in, hence my new home inspired post today!


For a quirky new home present how about these cute jam biscuits from Bee's bakery. Take them round to a new neighbour along with some mugs, teabags and milk and you'll soon have new friends!


Brighten up your new walls with Red Post Box's wall décor.  A happy house is what makes it your home, and this shabby chic poster is a perfect reminder of that.


For a friend or family member who's moving, help make their new home satisfaction even greater with a personalised card from Sharon Langdon. I love the doodle effect of this card, (I spent many hours doodling at school, sorry mum and dad). Check out her other artwork too.

 
Meiorigami have created this beautiful book lovers gift by carefully folding the pages of an old library book. It's a very unique idea of rejuvenating an old book, and best of all, as it doesn't damage the book it could still be read should you wish too. Make sure you take a look at the other words available.


Textile art is very popular right now, and for good reason. It is very homely and great for giving your home a colourful, shabby chic splurge. I love the colours  Naisy Homemade has used for this applique 'Home Sweet Home' picture.

Happy New Home!

 You might also like
Something Special: D n J Designs
Friday Finds: Beer
3D Garden Cross Stitch
Free Cross Stitch Pattern: Mum Roses Bookmark
Friday Finds: Oriental

Friday, 12 July 2013

Friday Finds: Aliens!

Have you ever wondered what's out there, hidden amongst the infinite universe of stars and comets. The world is so huge we know hardly anything about it, let alone the universe. Could there be there other life out there?

Personally I find it hard to believe that there isn't some form of life out there. Who knows where or what it could be, maybe there are countless other worlds full of strange plants and creatures. Maybe there are worlds similar to Earth, and maybe there are ones so different that we wouldn't recognise that the life was even life. Who knows, maybe there really are the stereotypical aliens out that somewhere, maybe not, but here's a few aliens you could have in your home, so you appear alien friendly, just in case they ever come and decide to take over our world...


This friendly little Alien worm is perfect for keeping track of all your pens. S/He will be the perfect quirky accessory that will make you the envy of the office. If you fancy making your own you can even buy the pattern too! Get your crazy alien worm from Butterfly Love 1.


Who doesn't have a soft spot for ET, the friendly alien who just wants to phone home. I never had an alien friend when I was a little girl, but how awesome would that have been! Second Chance Jewellery will give you plenty to reminisce about with their geeky ET silhouette necklace.


Jupiter Moon have the perfect twist on a guardian angel, how about a guardian alien instead? The simple bold design is fantastic, even those who aren't sci-fi geeks will love this design.


Tea Parties will never be quite the same when served out of this alien tea pot. from Richard Symons Art. It's unconventional and unique, and will most certainly be the talking point when you pour the tea for your grandma.


I've only got eyes for you. With that many eyes it is indeed quite the compliment. Out from the Shadows card is a great way of showing your sentimental feelings to a loved one in a funny, geeky, science way.

Happy alien hunting!

You might also like
Friday Finds: Science Geekery
In progress: Tardis Keyring Cross Stitch Kit
Geeky Science Cross Stitch
Pendant Experiments
Friday Finds: Monsters

Sunday, 16 June 2013

Fathers Day Card

Happy Fathers Day!

Here is the card I made for my dad this year.


It was really easy to make, I just cut out all the shapes using some of the multitudes of my craft paper stash (there's plenty more where that came from) and glued them on using PVA. I then added some sequins and a bit of ribbon which I managed to twist and which dried on wonky, but never mind. It (hopefully) adds to the shabby chic theme.
 
My dad really is a star, so he definitely deserves to hear it! he's been very good as my handy man around the house. I helped him to give the garden a fabulous make over a few years ago, and he's come and sorted out a multitude of small household jobs for me too. He's always very supportive, (sometimes over protective) and gives me plenty of advice (sometimes too much) but he has always been there for me and always will be when I need him again. Thanks dad for being a star!

Happy Fathers Day!

You might also like
Fathers Day Card:2012
Friday Finds: Rugby
Free Cross Stitch Chart: Dad Bookmark
Project Tutorial: Embroidered Birthday Card
Friday Finds: Movember

Friday, 24 May 2013

Friday Finds: Cupcakes

I reckon it's time for a tasty treat! It's been a long and busy week for me, as my boss was off so I've been on my own in the lab, beginning with 2 very long days on Monday and Tuesday, so now I think I've earned a little treat, and what better than a cute and tasty little cupcake? Even better, why not treat yourself and have a cupcake with me!

Ummm... Delicious!


Right, that's better. Now we're both happy having treated ourselves to a yummy cupcake, lets keep the satisfaction of the moment going by browsing these cute calorie free cupcakes!


Aphrodite delights are the creators of this beautiful cupcake. The look good enough to eat but don't be fooled by the glittery frosting, this cupcakes are bath bombs, so head over and choose from the many cupcake designs for the one you want to relax with!


If you fetish for cupcakes is something you want to display in a big way, then take a closer look at Dash Ambler's cute cupcake dress. It is frilly, flirty and very feminine, so you're girly sized will be happy to!  


We all have a little cupcake. It could be your daughter, a niece, a sister or a friend. Tell them what they are with Nyha Graphics' colourful card. It's blank for your own message, although the one on the card says it all!


If making things is more your cup of tea, then this cupcake cross stitch pattern by And Wabisabi makes the perfect accompaniment. The bold and bright design not only looks fun to stitch, and but also cute to look at once it's stitched!


Cupcakes should come with oodles of frosting. It's even better when topped off with glitter, like this lilac cupcake key ring from  Sweat n neat jewellery. It'll always make you smile when you reach for your keys.

Happy munching!

You might also like
Cupcake Decorating
Free Cross Stitch Chart: Fathers Day
Friday Finds: For Charity
Work In Progress: Shh Now
Friday Finds: New Sheets


Friday, 17 May 2013

Friday Finds: Dragonflies

I had originally decided on blossom for todays theme, but it's grey outside, and looks like it's about to hammer it down with rain, so my mood's not really right for looking at spring blossoms. At a bit of a loss, I decided to see if there was anything on the Etsy homepage to inspire me, and I was not disappointed. This beautiful Golden Breeze Treasury was featured, and the very first item, this beautiful pair of golden dragonfly earrings by CyKLu, gave me an idea I could not pass on. After all, dragonflies are beautiful creatures, and come in all sorts of lovely colours, sparkling and flashing in the light as they dart over the water like flying jewels.
 
 
This blank greeting card is the perfect way of sending a special message in a pretty way. It is a print of a watercolour by ARTonStuff, and captures the delicacy of a dragonflies wings perfectly. Check out they other cards too!
 
 
mbStitch is a very talented embroiderer who has hand stitched this bold dragonfly design onto a lavender bag. Hand embroidering takes a lot of time and patience (I should know) and this beautiful piece definitely caught my eye.
 
 
For some fluttering dragonflies and butterflies take a closer look at this lampshade by WEFT Bespoke Design. The cotton is hand printed, and this natural design is perfect to a touch of the outdoors.
 
 
There is a huge variety of gorgeous dragonfly jewellery on Etsy, but this one by Cottage Coppicing attracted me not because of the colour, but because a circle of beech wood has been used to house the dragonfly in a unique and funky style.  
 
 
We all have something we hoard, weathers it's buttons, receipts, or jewellery. This beautiful keepsake box is a great excuse to collect even more things! I love the shabby chic design and colours that Spiral Moon Fantasy have used on this hand painted wooden box.
 
Happy Shopping!
 
You might also like


Monday, 13 May 2013

Wedding Cross Stitch Kits

After a weekend spent making wedding Invitatio0ns and shopping for bridesmaids dresses (my sister is tying the knot in November) you might think I've had enough of wedding things for a few days (Ok, I have really) but it has inspired my latest cross stitch kits, charts, and patterns search. After all, the wedding favours for the girls are cross stitch scented bags (I have made 1 and a bit so far for my sister, they take ages!) and I have a few other embroidery ideas for the Hen do, depending on time. So, here are just a few of the very many wedding cross stitch kits out there!

 
Forever Friends Wedding Sampler from Rainbow Crafts
 
 
The First Dance Wedding Sampler from Walkabout Crafts
 
 
3D Wedding Cake Cross Stitch Card from Past Impressions
 
 
Wedding Waltz by Atlas Crafts


 Wedding ABC from Cross Stitch World
 
 
Happy Wedding Stitching!
 
 
You might also like


Wednesday, 8 May 2013

Free Chart: Fathers Day Card

This year Fathers Day is on June 16th, so you have plenty of time to make this free cross stitch chart into a fantastic hand embroidered card for him. Don't worry if you're a beginner, as this chart uses only full cross stitches. It only uses 2 colours, although you could use any colours you like. That's the advantage of a pattern, so dig out your leftover embroidery threads and get stitching!


The finished chart will be 4" (10.2cm) x 3" (7.6cm) in size when stitched on 14 count aida. You will need approx. 110cm length of thread for the black (writing) and approx. 180cm length of thread for the maroon (pattern). To make it look funky why not use a variated thread? Or a coloured aida background?


To finish it why not head over to my Project Tutorials to see a couple of different techniques I have used to finish off cards.
 
Happy Stitching!
 
 
You might also like


Tuesday, 9 April 2013

Project Tutorial: Bicycle Card

I made this embroidered metallic blue bike card for my dad's birthday. As it is a blank card is suitable to be used for any occasion, such as Fathers Day, Birthdays, or even a Congratulations card! You could easily use different colours to customise it.  What do you think? It's easy to do, and you could easily use this method to create your own designs too.
You will need
Embroidery threads (I used DMC 310 black and some metallic blue thread)
Even weave (I used 28 count)
Card (I used a pre-folded card that was 6"x4")
Spare Card for the border
Clear drying glue e.g. PVA or double sided tape.
First of all, you can print this chart out to the size you require for your card. I used a bike length of 10cm. (alternatively you can draw your own. TIP: use pencil first so you can rub it out if you go wrong before drawing over it in a black pen)
The next step is easy. Place the even weave over your design. You should be able to see the outline of the bike. Using a fabric pen if you have one, (or a pencil if you don't) carefully trace the design onto the even weave, making sure you don't move the design.
Now it's time to get stitching! Stitch over the lines of the design beginning with the bicycle frame. I used 2 strands of black thread and 3 strands of metallic blue thread (because it was quite thin, 2 strands of normal embroidery cotton will be fine).
Handles: Satin Stitch
Seat: Padded Satin Stitch
Frame: Satin Stitch
Wheels: Chain Stitch
To give the card a nice finish, I then trimmed down some spare card to 5.5" x3.5" to give a border around the frame, and then cut out an aperture size of 5"x3".
Now you're ready to assemble your card.
First, trim down your bike design to 5.5" x 3.5", being careful to ensure that the bike is central, so it will fit in the card border without any overhanging. (You may need to trim it slightly smaller due to the fabric stretching) Ensure there is an overlap of even weave and card. Carefully glue the bicycle design to the green card using either a clear drying glue or double sided sticky tape, and leave to dry.
Once dry, carefully glue the bike and border to the card, ensuring it is centrally positioned. It should look something like this once completed!
Alternatives: Use a smaller design/ larger card and place the design at an angle.
Add embellishments in the form of ribbons, bows, buttons, sequins, e.t.c.
Happy Stitching!
You might also like

Monday, 4 March 2013

Project Tutorial: Mothers Day Card

Naturally for Mothers Day next Sunday I had to design and make a card. With new stitch inspiration from my new Encyclopaedia of Stitches in the form of Rosebud Stitch, flowers were the obvious choice. It was easy to think of a slightly corny saying for the card. Besides, it might be corny but t's true, I wouldn't change my mum for anything! So here's the card I made, which you are more than welcome to reproduce for your own mum. Because it doesn't mention mothers day in the saying, you could use it as a birthday card for your mother too. I'm quite proud with the card, it's pretty easy and simple to make, once you've got the hang of all the different stitches!
 
Here's the chart I've developed. I stitched it using 2 strands of embroidery cotton for each colour, on 14 count pale blue aida using the DMC threads and beads stated below the chart, but if, like me, you have a stash of embroidery threads then just use whatever is too hand, or tailor it using your mums' favourite colours! The finished Chart size is approx. 3" (7.5cm) x 4" (10cm). Remember to cut the aida at least 2" bigger.


Writing: DMC 552
Basket: DMC420
Flower centres: DMC 445 (rosebud and spikey flower)
Flower centre, Daisy: Mill Hill yellow seed beads (can substitute with French knots in DMC 445)
Rosebud: DMC Colour Variations: 4180
Daisy: DMC Light effects 5200
Spikey Flower: DMC Perle 8 colour 99
Leaves/ Stems: DMC 320
 
How to Stitch:
 
Writing: Mostly Backstitch with some Cross Stitch
Basket: All Backstitch
Rosebud: Use Rose Stitch with a French Knot centre
Spiky Flower: Use Satin Stitch for the centre, with Backstitch petals ending in a French knot.
Daisy: Use Lazy Daisy Stitch for the petals, add a seed bead or French Knot for the centre.
Leaves: Use small Lazy Daisy stitch.
Stems: Use Backstitch for the Rose and Daisies, and Stem Stitch for the Spiky flowers.
 
Once you've finished stitching it, it should look something like this! From here on it's easy, all you need to do is trim down the cross stitch to the required size. (I left 5 squares either side and 7 squares above and below) and simple glue it onto the card, using either a clear drying adhesive such as PVA or double sided sticky tape. Just make sure you have glued down all the edges to prevent fraying.
As an alternative, you may wish to fray the edges, in which case leave an extra couple of squares all the way round after trimming the cross stitch down, and gently and carefully pull away the threads for those extra 2 squares. You can embellish the card or finish it in any way you want. Write your own personal message inside the card, and hey presto, you've made a simple embroidery mothers day card! She will love it as you have taken the time and effort to make it!

Friday, 15 February 2013

Friday Finds: Bunny Rabbits

Last weekend I made the train journey back to Rugby, to stay with my sister in her brand new house. The walls are magnolia, everywhere was spotless, they were still waiting for a sofa to be delivered. But she had found time to add a couple of little cute bunny rabbits (Pippin and Orlando) to her new house.

When we were children I had a Guinea Pig Rabbit and she had a Rabbit, (well, 2 actually, as 1 died so the 2nd was a replacement; my little guinea pig was so depressed after the first one died), so it reminded me of nostalgic our childhood and day's spent busy playing with them in the garden. If you had a pet, be it a rabbit, cat, dog, cockatoo or goldfish (OK, maybe not the goldfish) you'll know what I mean. Playing with pets and cuddling them is always lovely. As such, today's theme is for all those bunny lovers!


Half Penny Bazaar have created these cute soft fleece baby blankets. They look so warm and perfect for cuddling up a newborn in. Don't worry though, it's also machine washable for when your darling baby is being a little messy pot!


This monochrome Rabbit coin purse is very striking. It's a perfect grown up way to subtly show off you're bunny love. Head over to Handmade Rasberry to check it out.

If it's a certain Peter Rabbit that tickles your fancy, then look no further than this adorable illustrated pendant by Lauras Jewellery for some vintage Beatrix Potter inspired necklaces.


Something about babies and bunnies just works well. For a special handmade baby girl congratulations card take a peek at this pretty design by Fluffy Duck. Don't worry, she has a boy bunny card too!


Kiln Fired Art have created this beautiful hand painted boxing rabbits bowl would look perfect displayed on a wooden dresser in a country kitchen. Get back to the country bumpkin inside you. If only i had a little house in the country (or space for a fancy dresser)....


Happy Shopping


You might also like
Friday Finds: Sheep
Craft Fair Preview
St Georges Day
Friday Finds: Caves
Shake Rattle n' Roll Charity Night


Wednesday, 5 December 2012

Tutorial: Embroidered Birthday Card

A couple of weeks ago it struck me that one of my favourite things to read on other crafty blogs is the tutorials, and yet I have written none myself!  So, I've decided to give it a go, please let me know what you think of it!

This tutorial will show you how to make an embroidered card, similar to this one. The card below is A6 size, and uses a blue ready folded card with a cut down smaller piece of pink card, onto which the design is hand embroidered.


Difficulty: Intermediate

Materials needed: card and envelope.
Extra piece of card (cut down to approx 2cm smaller than the front of the card)
Embroidery threads
Pencil
Needle
Tracing paper (optional)
glue (or double sided sticky tape


Step1:  Draw out your design. Practise it first on scrap paper until you are happy with it, then trace over the design using the tracing paper. Transfer the design onto the reverse of the small piece of card, ensuring that the design is transferred in reverse (the writing must be backwards). Alternatively free - hand draw the design onto the reverse of the smaller piece of card, but make sure that the lettering is all backwards. (This is the method I used). Your reverse of the small card should look like this.

Step2: Carefully embroider the design onto the card. The pattern is on the reverse side (opposite to normal embroidery, so that the pencil marks don't show up on the front of the card.) I used 3 strands of DMC embroidery thread for the flower, and 2 strands for the message. I used backstitch for the words, flower and leaf outline, Stem stitch for the flower stem and satin stitch for the flower centre. Note: be careful that the stitches aren't too small, as this could cause the card to tear. My backstitch were approx 1/2 cm in length on average. It also helps to stab the next hole required through from the reverse of the card, rather than the front of the card to ensure that the design is followed accurately. Please be very careful when stabbing the needle through the card, it is best to have some padding e.g a cutting board, behind it to prevent creasing the paper, or stabbing yourself with the needle. Once finished, the reverse will look something like this.


Step3:  Work out how you would like to position your design onto the per-folded card, (I did mine at a straight angle, but you could do yours at a diagonal to make the card look more jaunty). The apply glue or double sided sticky tape to the reverse of your design (I used double sided sticky tape as it's quicker), If using glue, I recommend a clear drying one, such as PVA. Hold above the card and slowly lower it into place. Press down to ensure it is firmly attached and allow to dry. Ta da! Finished!

Once you've given it a go once, then have a go at other designs and images!

Good Luck!


You might also like
Friday Finds: Seaside
The Clothes Maiden: Online Magazine Feature
Spring, Cambridge and Punting
Friday Finds: Sunflowers
WIP: Peak District Photo Conversion


Thursday, 9 August 2012

Happy Birthday Rhian!

Yesterday was my best friends birthday. Rhian was born on that day a quarter of a century ago.  We met during a PE lesson at school thanks to our mutual rubbishness at sport, and our friendship quickly blossomed.

Rhian is a lovely person, and when it comes to choosing gifts it should be easy. She likes a lot of things. Jewellery is always welcome, along with anything Celtic (she's half welsh and loves Celtic patterns). She has also been a fan of dolphins for as long as I can remember. She is a supporter of Northampton Saints Rugby Team, and is a science geek. A chatterbox and a bookworm (especially for fairy tales). with so much choice, it should be easy. The trouble is that everyone else knows all of the things she likes, and she has a lot of jewellery, a lot of dolphin posters and ornaments, along with funny science posters. She has a Rugby Jersey, and lots of items with Celtic patterns, so how on earth could I choose. Where should I start.


After some contemplation I searched for 'celtic dolphin' in Etsy. A few pages of gorgeous items were found, but one type in particular caught my eye. It was a necklace with a mini book pendant, with a dolphin on the cover. Perfect. It was a little expensive however, and was pre-printed with a poem. Inspiration had struck however, and after a little more searching I settled on this red leather bound mini book pendant by The Press Gang, it even has a cute little clasp. The pages were blank, so I filled most of them with various quotes and pictures of us and places we'd been. I then carefully packaged it back up, (it had arrived beautifully packaged in brown paper tied with twine, simple and stylish) before hastily posting it along with the card. Considering I didn't post it until Tuesday Afternoon, I was very pleasantly surprised when Rhian texted me the next day to say it had arrived, perfect timing for her birthday!

Designing a card was somewhat easier. I wanted it to be fairly simple, so 'Happy Birthday Rhian' was an easy message to include. I also included small Celtic pattern motif's in the corners. Red had to feature as it's Rhian's favourite colour, and I wanted to outline the Celtic motif in Gold to make them stand out more. However, I wasn't sure what colour to use. Maybe a darker red for contrast, but that could be a bit boring, or maybe purple, her second favourite colour, but I didn't think it would compliment the red. Que Chris, who suggested green when I asked his advice. Perfect. I love the combination of the bright colours, and I think it adds to the Celtic effect. It also made it an easy choice to use yellow card with a red inside, using the same technique as that of the Fathers Day card I made previously. What do you think?

Happy Stitching!

You might also like
Friday Finds: Friends
Spring, Cambridge and Punting
Mothers Day
Friday Finds: Hobbits
Fairy Tale Cross Stitch Kits