Showing posts with label Project Tutorial. Show all posts

Tuesday, 9 April 2013

Project Tutorial: Bicycle Card

I made this embroidered metallic blue bike card for my dad's birthday. As it is a blank card is suitable to be used for any occasion, such as Fathers Day, Birthdays, or even a Congratulations card! You could easily use different colours to customise it.  What do you think? It's easy to do, and you could easily use this method to create your own designs too.
You will need
Embroidery threads (I used DMC 310 black and some metallic blue thread)
Even weave (I used 28 count)
Card (I used a pre-folded card that was 6"x4")
Spare Card for the border
Clear drying glue e.g. PVA or double sided tape.
First of all, you can print this chart out to the size you require for your card. I used a bike length of 10cm. (alternatively you can draw your own. TIP: use pencil first so you can rub it out if you go wrong before drawing over it in a black pen)
The next step is easy. Place the even weave over your design. You should be able to see the outline of the bike. Using a fabric pen if you have one, (or a pencil if you don't) carefully trace the design onto the even weave, making sure you don't move the design.
Now it's time to get stitching! Stitch over the lines of the design beginning with the bicycle frame. I used 2 strands of black thread and 3 strands of metallic blue thread (because it was quite thin, 2 strands of normal embroidery cotton will be fine).
Handles: Satin Stitch
Seat: Padded Satin Stitch
Frame: Satin Stitch
Wheels: Chain Stitch
To give the card a nice finish, I then trimmed down some spare card to 5.5" x3.5" to give a border around the frame, and then cut out an aperture size of 5"x3".
Now you're ready to assemble your card.
First, trim down your bike design to 5.5" x 3.5", being careful to ensure that the bike is central, so it will fit in the card border without any overhanging. (You may need to trim it slightly smaller due to the fabric stretching) Ensure there is an overlap of even weave and card. Carefully glue the bicycle design to the green card using either a clear drying glue or double sided sticky tape, and leave to dry.
Once dry, carefully glue the bike and border to the card, ensuring it is centrally positioned. It should look something like this once completed!
Alternatives: Use a smaller design/ larger card and place the design at an angle.
Add embellishments in the form of ribbons, bows, buttons, sequins, e.t.c.
Happy Stitching!
You might also like

Monday, 4 March 2013

Project Tutorial: Mothers Day Card

Naturally for Mothers Day next Sunday I had to design and make a card. With new stitch inspiration from my new Encyclopaedia of Stitches in the form of Rosebud Stitch, flowers were the obvious choice. It was easy to think of a slightly corny saying for the card. Besides, it might be corny but t's true, I wouldn't change my mum for anything! So here's the card I made, which you are more than welcome to reproduce for your own mum. Because it doesn't mention mothers day in the saying, you could use it as a birthday card for your mother too. I'm quite proud with the card, it's pretty easy and simple to make, once you've got the hang of all the different stitches!
 
Here's the chart I've developed. I stitched it using 2 strands of embroidery cotton for each colour, on 14 count pale blue aida using the DMC threads and beads stated below the chart, but if, like me, you have a stash of embroidery threads then just use whatever is too hand, or tailor it using your mums' favourite colours! The finished Chart size is approx. 3" (7.5cm) x 4" (10cm). Remember to cut the aida at least 2" bigger.


Writing: DMC 552
Basket: DMC420
Flower centres: DMC 445 (rosebud and spikey flower)
Flower centre, Daisy: Mill Hill yellow seed beads (can substitute with French knots in DMC 445)
Rosebud: DMC Colour Variations: 4180
Daisy: DMC Light effects 5200
Spikey Flower: DMC Perle 8 colour 99
Leaves/ Stems: DMC 320
 
How to Stitch:
 
Writing: Mostly Backstitch with some Cross Stitch
Basket: All Backstitch
Rosebud: Use Rose Stitch with a French Knot centre
Spiky Flower: Use Satin Stitch for the centre, with Backstitch petals ending in a French knot.
Daisy: Use Lazy Daisy Stitch for the petals, add a seed bead or French Knot for the centre.
Leaves: Use small Lazy Daisy stitch.
Stems: Use Backstitch for the Rose and Daisies, and Stem Stitch for the Spiky flowers.
 
Once you've finished stitching it, it should look something like this! From here on it's easy, all you need to do is trim down the cross stitch to the required size. (I left 5 squares either side and 7 squares above and below) and simple glue it onto the card, using either a clear drying adhesive such as PVA or double sided sticky tape. Just make sure you have glued down all the edges to prevent fraying.
As an alternative, you may wish to fray the edges, in which case leave an extra couple of squares all the way round after trimming the cross stitch down, and gently and carefully pull away the threads for those extra 2 squares. You can embellish the card or finish it in any way you want. Write your own personal message inside the card, and hey presto, you've made a simple embroidery mothers day card! She will love it as you have taken the time and effort to make it!

Wednesday, 9 January 2013

Tutorial Challenge!

Probably my favourite part of reading other crafty blogs is the tutorials. I love learning how to create new things, learning different techniques and gaining inspiration from other peoples creativity. I've had an attempt at writing my first ever tutorial in December, and I was fairly pleased with it, but I think I can do better. More pictures, less words. So I am going to challenge myself to write a tutorial every week for a year. It could be project tutorials, like my embroidered birthday card, or a tutorial for a new stitch (I have a hand embroidery stitch bible and really want to learn more of them).


As well as sharing my knowledge, and hopefully giving back to others all of the things I have taken from other blogs, this challenge will help keep me inspired and help me learn loads of new things along the way, (probably with a few disasters to share with you too!).
 
Anyway, I guess I'd best get thinking of a few things to do...
 
Is there something you'd like to see? If so please leave a comment with your ideas below!

Happy Making!

You might also like
Friday Finds: Sunflowers
Project Tutorial: Bicycle Card
The Clothes Maiden: Online Magazine Feature
Stumpwork Fancies
Friday Finds: Calendars


Wednesday, 5 December 2012

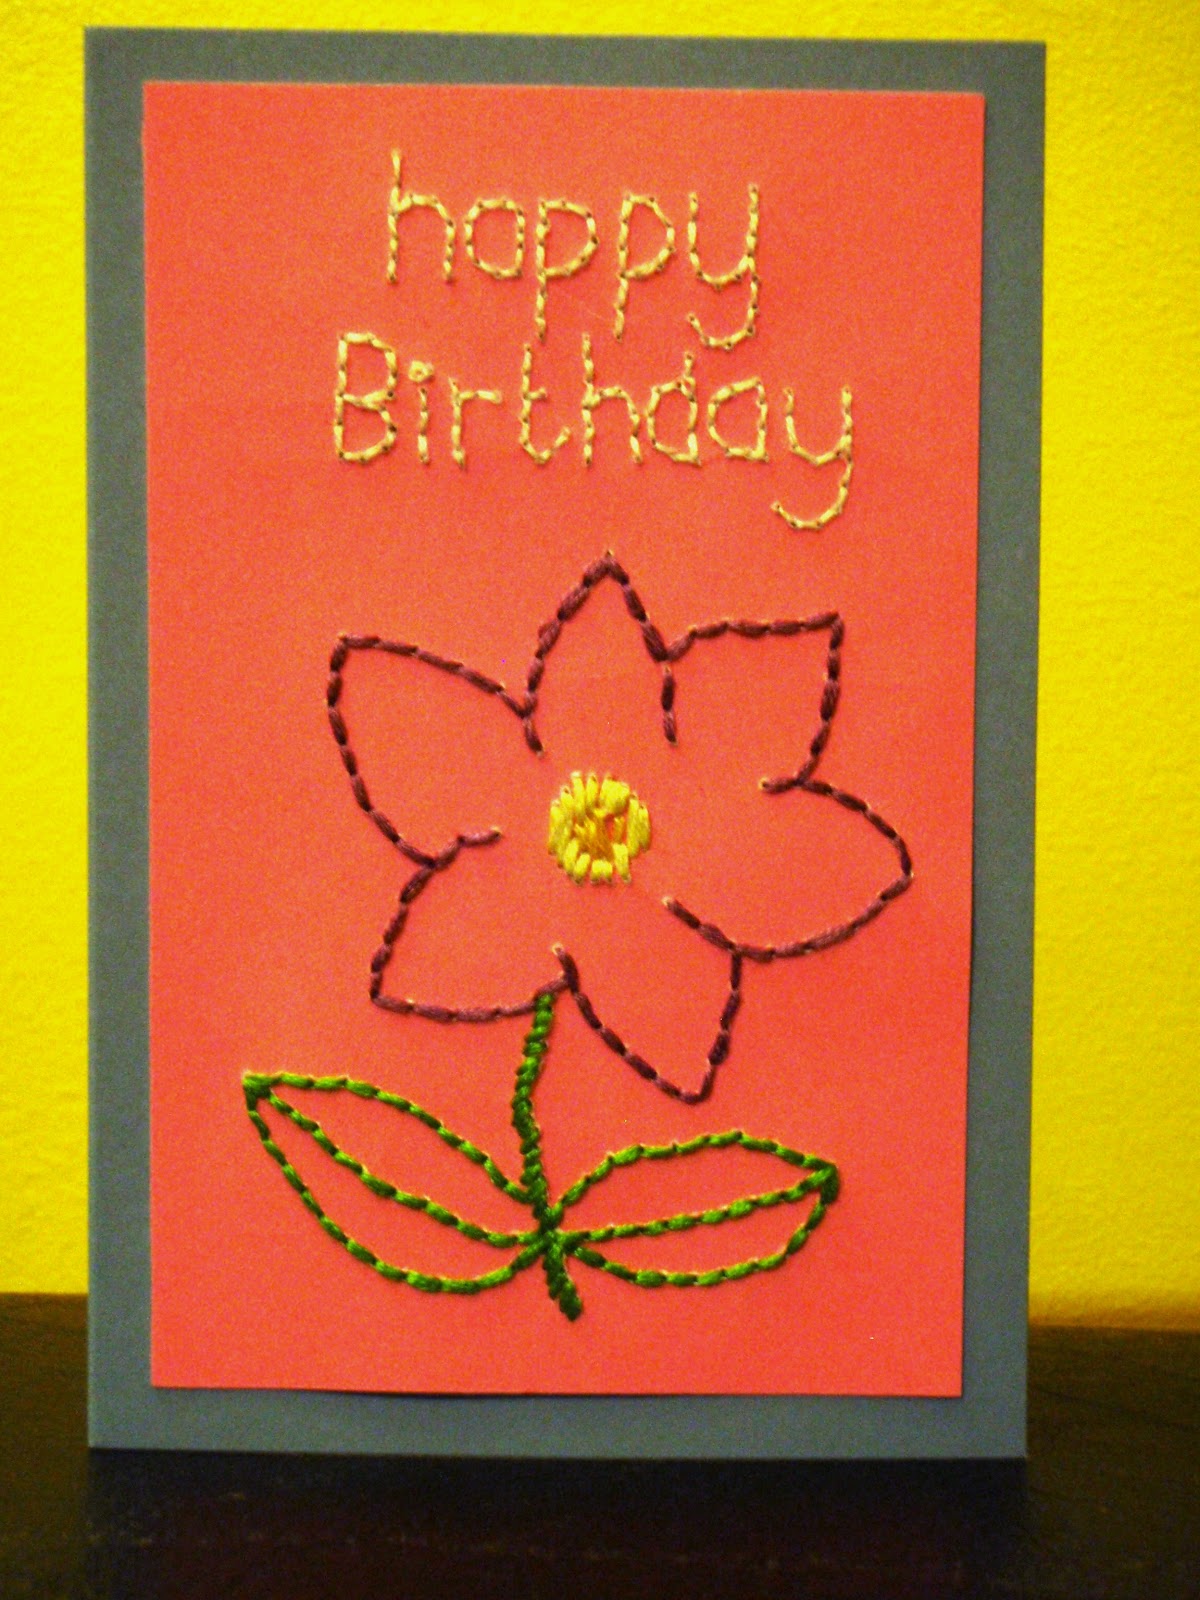
Tutorial: Embroidered Birthday Card

A couple of weeks ago it struck me that one of my favourite things to read on other crafty blogs is the tutorials, and yet I have written none myself!  So, I've decided to give it a go, please let me know what you think of it!

This tutorial will show you how to make an embroidered card, similar to this one. The card below is A6 size, and uses a blue ready folded card with a cut down smaller piece of pink card, onto which the design is hand embroidered.


Difficulty: Intermediate

Materials needed: card and envelope.
Extra piece of card (cut down to approx 2cm smaller than the front of the card)
Embroidery threads
Pencil
Needle
Tracing paper (optional)
glue (or double sided sticky tape


Step1:  Draw out your design. Practise it first on scrap paper until you are happy with it, then trace over the design using the tracing paper. Transfer the design onto the reverse of the small piece of card, ensuring that the design is transferred in reverse (the writing must be backwards). Alternatively free - hand draw the design onto the reverse of the smaller piece of card, but make sure that the lettering is all backwards. (This is the method I used). Your reverse of the small card should look like this.

Step2: Carefully embroider the design onto the card. The pattern is on the reverse side (opposite to normal embroidery, so that the pencil marks don't show up on the front of the card.) I used 3 strands of DMC embroidery thread for the flower, and 2 strands for the message. I used backstitch for the words, flower and leaf outline, Stem stitch for the flower stem and satin stitch for the flower centre. Note: be careful that the stitches aren't too small, as this could cause the card to tear. My backstitch were approx 1/2 cm in length on average. It also helps to stab the next hole required through from the reverse of the card, rather than the front of the card to ensure that the design is followed accurately. Please be very careful when stabbing the needle through the card, it is best to have some padding e.g a cutting board, behind it to prevent creasing the paper, or stabbing yourself with the needle. Once finished, the reverse will look something like this.


Step3:  Work out how you would like to position your design onto the per-folded card, (I did mine at a straight angle, but you could do yours at a diagonal to make the card look more jaunty). The apply glue or double sided sticky tape to the reverse of your design (I used double sided sticky tape as it's quicker), If using glue, I recommend a clear drying one, such as PVA. Hold above the card and slowly lower it into place. Press down to ensure it is firmly attached and allow to dry. Ta da! Finished!

Once you've given it a go once, then have a go at other designs and images!

Good Luck!


You might also like
Friday Finds: Seaside
The Clothes Maiden: Online Magazine Feature
Spring, Cambridge and Punting
Friday Finds: Sunflowers
WIP: Peak District Photo Conversion