Showing posts with label embroidery. Show all posts

Wednesday, 29 January 2014

SALE: Heart Earrings: Miscellaneous £3

Description
All earrings have sterling silver findings with butterfly backs. The design is 1.5cm in diameter. Colours may vary from the photos, however the earrings you will receive is the one pictured. There may be slight differences between both earrings as they are all handmade and therefore unique. For further Information please email me at yousewshould@gmail.com

Postage and Payment
Earrings cost £3.
UK Postage and Packaging is £1.20. Postage is combined for multiple purchases.
Please email me at yousewshould@gmail.com to arrange payment via paypal.
If you are from outside the UK please email me at the above address for postage costs.


Pink Embroidered Heart

Sequinned Pink Heart
 
Sequinned Lilac Heart

Pale Pink and Purple Embroidered Heart


You might also like
SALE: Heart Earrings £4
Friday Finds: Valentine Hearts
Project Tutorial: Bicycle Card

Friday, 29 November 2013

Free Chart: Wedding Card

My sister Jessica recently got married to her lovely new husband, Danny after 3 1/2 years together. She asked me to be her bridesmaid, which was lovely of her and I really enjoyed it, (despite the stress of helping plan a wedding, and making sure everything runs smoothly. She tied the knot at Brownsover Hall Hotel, which was an absolutely beautiful setting. The whole day was lovely, (although over to quickly). As she's my favouritist sister in the whole wide world (and my only one) there was no question that I wanted to make her a special wedding card for the big day, which, now that it is all over, I am sharing with you!


I used a dark red and gold for the heart border, and a sparling champagne coloured thread for the champagne glasses. I sued 1 strand of thread for all the stitching, including the backstitch. I stitched this on a 22 count even weave, which gave a finished size of 10.5cm (4") x 15.5cm (6"), perfect for an A4 card. On 14count aida the finished size is 16cm (6.5") x 24cm (9.5"). For techniques on finishing the card, please see my Project Tutorials page. I used the same technique as I did for the embroidered bicycle card but I used gold card instead, with a pearlised red card border. Unfortunately I don't have a photo of the finished card, I didn't get round to making it until a few days before the wedding!
 
Happy stitching
 
You might also like
 

Monday, 8 July 2013

Stitching Tools: The Humble Thimble

I very rarely write anything about the tools I use, or little tips and tricks that I've picked up during my cross stitch and embroidery years. However, we all have out little techniques that we learnt from some forgotten time and place, that we now could no longer do without. Or maybe for you it's a certain invaluable embroidery stitching tool.  After a year and a half of regular blogging it's about time I shared some of my knowledge with you. So, here goes.
 
This is the thimble I have
The humble thimble is one essential embroidery tool that I could not stitch without. Ok, aside from the obvious needle, thread and fabric. Mine is just a little ridged metal thimble, but it saves my fingers every time I push the needle through. When I first started to stitch several years ago I never bothered with one, and was constantly pricking myself (Ok, that still happens) but I no longer end up with a dent in my finger from pushing the needle through. It is invaluable especially with cross stitches with a small count (more stitches per inch) as the holes quickly become tight with previous stitches. I only have one, however, which means I have spent a fair amount of time searching for it when I've forgotten where I put it 5 minutes ago and have ended up on my hands and knees peering under the sofa for it.
 
I highly recommend trying out a thimble if you never have. They come in different sizes so get one that's right for you. I also recommend trying out different fingers. I have settled on using my middle finger of my right hand, but I'm sure that many other embroiderers use different fingers. They're cheap, they come in all sorts of different patterns too, so can be a pretty tool as well as a useful one!


What are your thoughts on the humble thimble? A stitching must have that you can't do without or a stitching miss that is left to gather dust wherever it ended up after rolling under the sofa?
 
Happy Stitching!
 
You might also like
 

Tuesday, 2 July 2013

Hardanger Wish List

About a year ago I finished my first (and only) Hardanger embroidery. I really enjoyed stitching it although cutting out the squares was fairly fiddly. (It probably didn't help that I didn't have special hardanger scissors). However, at some point I would love to do some hardanger,  although I should wait until the next couple of months have gone by, as I've got to pack up to move house, (which also includes finding somewhere to live) and a 2 week holiday booked. When I do find the time I might try stitching an all white hardanger project, or something useful like a coaster or pincushion. Luckily there's plenty for me to dream about and browse in the meantime, such as these fabulous hardanger embroidery designs, all of which are on my ever growing wish list. Too many projects and not enough stitching time!


Kaleidoscope Coaster by Mabel Figworthy


White Diamond Pin Cushion from arts and designs


Black Hardanger Table Runner from Casa Cenina
Hearts and Flowers Biscornu from Aigullie Anglaise


Bookmark from Nordic Needle

Happy Stitching!

You might also like
Stitches Past
Free Chart: Mum Rose Bookmark
Friday Finds: Oriental
Map Cross Stitch
Happy Birthday Rhian: Celtic Card and Gift


Sunday, 23 June 2013

WIP: Shh Now

Recently I have been stitching away on my first ever monochrome and portrait cross stitch. You may remember that I began stitching the cross stitch pattern for Shh now from Heaven and Earth Designs back in March. I'm really enjoying stitching it, there are areas of block colour which are pretty quick to complete, interspersed with more patchy areas, to keep it interesting.


Here is where I'd got to in my update from March.


As you can see most of what I had done was white block, which was fairly boring, so I was pleased to reach her hair. I can proudly say that I finished Page 1 on Friday, and here's the picture to prove it!


As you can see her face is taking shape nicely. I can't wait to finish her eye, as it was one of the features of this cross stitch chart that drew me to embroider it. I have spent the last couple of evenings stitching away, so it shouldn't be too long before her eye is completed! Anyway, enough nattering, bring on the needle and threads!

Happy stitching!

You might also like
WIP: Peak District Photo Conversion
Wedding Cross Stitch Kits
Friday Finds: Summer Sun
Project Tutorial: Embroidered Flower Birthday Card
You Shall go to the Ball: Charity Ball and Cinderella Cross Stitch

Friday, 17 May 2013

Friday Finds: Dragonflies

I had originally decided on blossom for todays theme, but it's grey outside, and looks like it's about to hammer it down with rain, so my mood's not really right for looking at spring blossoms. At a bit of a loss, I decided to see if there was anything on the Etsy homepage to inspire me, and I was not disappointed. This beautiful Golden Breeze Treasury was featured, and the very first item, this beautiful pair of golden dragonfly earrings by CyKLu, gave me an idea I could not pass on. After all, dragonflies are beautiful creatures, and come in all sorts of lovely colours, sparkling and flashing in the light as they dart over the water like flying jewels.
 
 
This blank greeting card is the perfect way of sending a special message in a pretty way. It is a print of a watercolour by ARTonStuff, and captures the delicacy of a dragonflies wings perfectly. Check out they other cards too!
 
 
mbStitch is a very talented embroiderer who has hand stitched this bold dragonfly design onto a lavender bag. Hand embroidering takes a lot of time and patience (I should know) and this beautiful piece definitely caught my eye.
 
 
For some fluttering dragonflies and butterflies take a closer look at this lampshade by WEFT Bespoke Design. The cotton is hand printed, and this natural design is perfect to a touch of the outdoors.
 
 
There is a huge variety of gorgeous dragonfly jewellery on Etsy, but this one by Cottage Coppicing attracted me not because of the colour, but because a circle of beech wood has been used to house the dragonfly in a unique and funky style.  
 
 
We all have something we hoard, weathers it's buttons, receipts, or jewellery. This beautiful keepsake box is a great excuse to collect even more things! I love the shabby chic design and colours that Spiral Moon Fantasy have used on this hand painted wooden box.
 
Happy Shopping!
 
You might also like


Tuesday, 9 April 2013

Project Tutorial: Bicycle Card

I made this embroidered metallic blue bike card for my dad's birthday. As it is a blank card is suitable to be used for any occasion, such as Fathers Day, Birthdays, or even a Congratulations card! You could easily use different colours to customise it.  What do you think? It's easy to do, and you could easily use this method to create your own designs too.
You will need
Embroidery threads (I used DMC 310 black and some metallic blue thread)
Even weave (I used 28 count)
Card (I used a pre-folded card that was 6"x4")
Spare Card for the border
Clear drying glue e.g. PVA or double sided tape.
First of all, you can print this chart out to the size you require for your card. I used a bike length of 10cm. (alternatively you can draw your own. TIP: use pencil first so you can rub it out if you go wrong before drawing over it in a black pen)
The next step is easy. Place the even weave over your design. You should be able to see the outline of the bike. Using a fabric pen if you have one, (or a pencil if you don't) carefully trace the design onto the even weave, making sure you don't move the design.
Now it's time to get stitching! Stitch over the lines of the design beginning with the bicycle frame. I used 2 strands of black thread and 3 strands of metallic blue thread (because it was quite thin, 2 strands of normal embroidery cotton will be fine).
Handles: Satin Stitch
Seat: Padded Satin Stitch
Frame: Satin Stitch
Wheels: Chain Stitch
To give the card a nice finish, I then trimmed down some spare card to 5.5" x3.5" to give a border around the frame, and then cut out an aperture size of 5"x3".
Now you're ready to assemble your card.
First, trim down your bike design to 5.5" x 3.5", being careful to ensure that the bike is central, so it will fit in the card border without any overhanging. (You may need to trim it slightly smaller due to the fabric stretching) Ensure there is an overlap of even weave and card. Carefully glue the bicycle design to the green card using either a clear drying glue or double sided sticky tape, and leave to dry.
Once dry, carefully glue the bike and border to the card, ensuring it is centrally positioned. It should look something like this once completed!
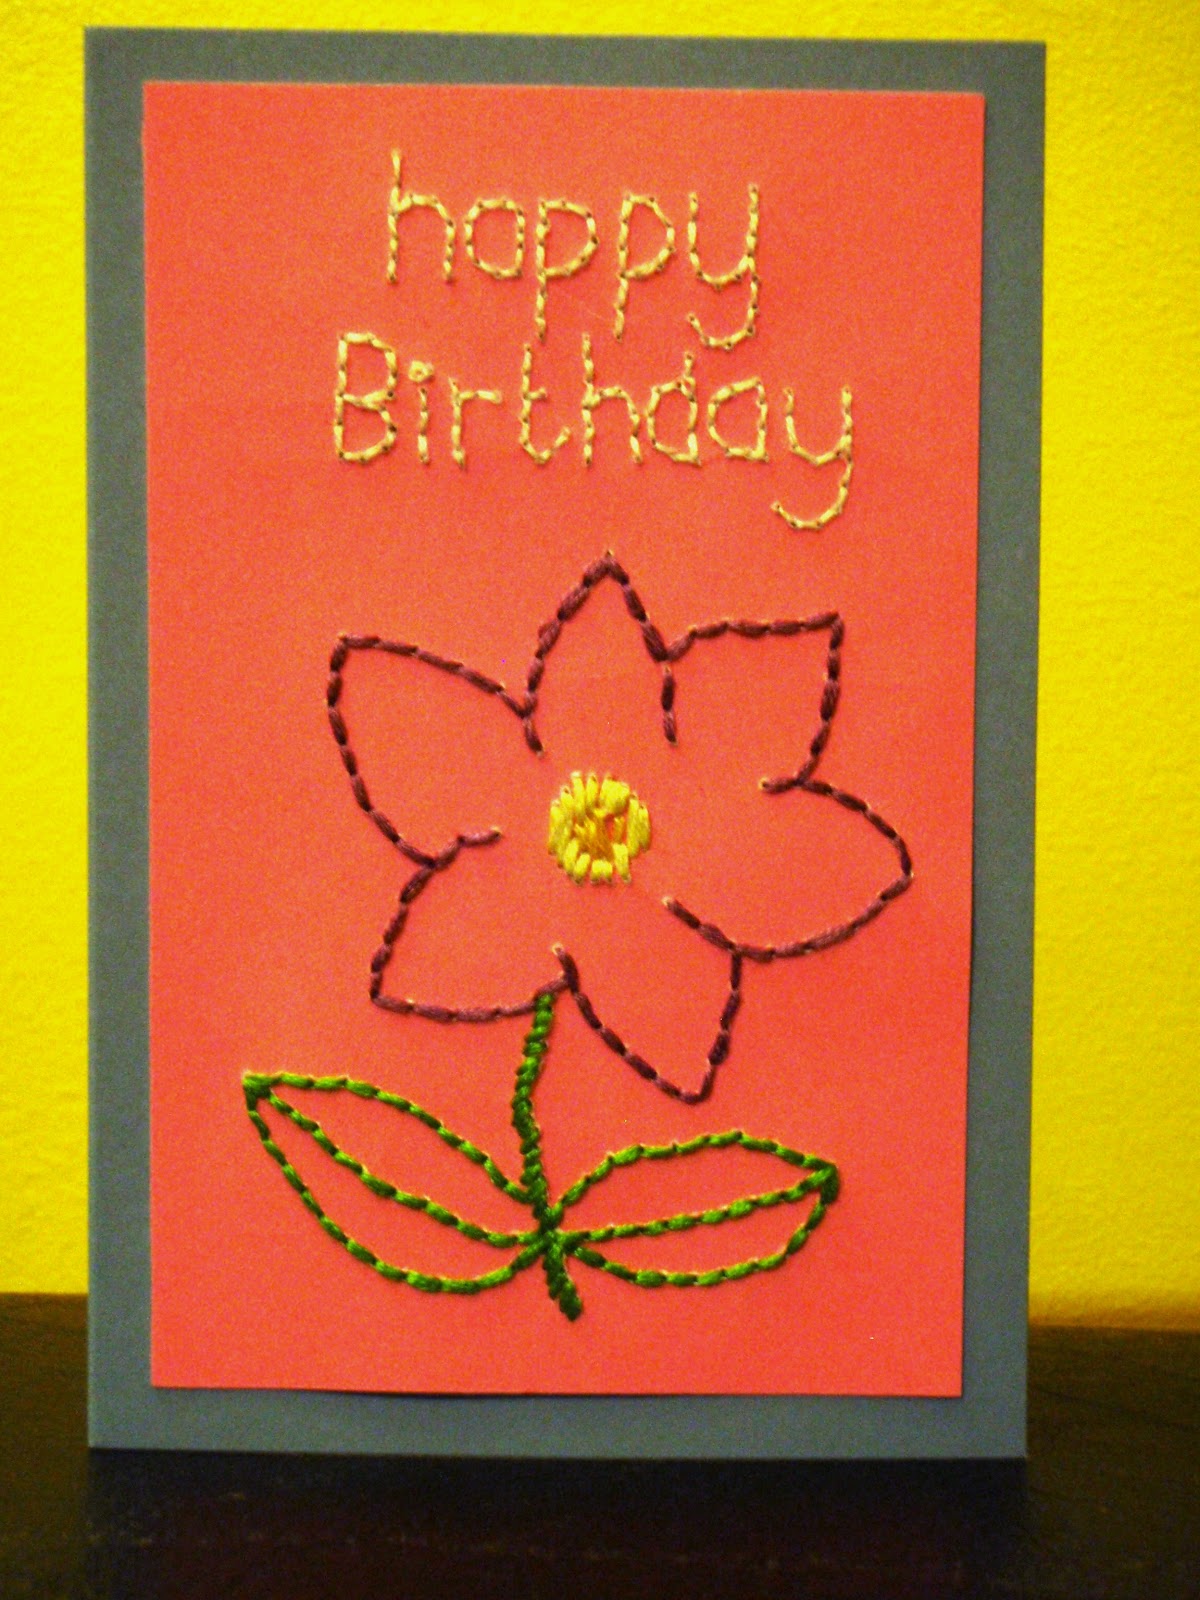
Alternatives: Use a smaller design/ larger card and place the design at an angle.
Add embellishments in the form of ribbons, bows, buttons, sequins, e.t.c.
Happy Stitching!
You might also like

Wednesday, 13 March 2013

Stumpwork Fancies

Stumpwork is a type of embroidery that incorporates 3D structures to create beautiful pieces. It is often used on leaves and flowers, but can be used in a variety of ways. After some lunch time stumpwork browsing, I discovered these beautiful pieces.

This beautiful Lilly Stumpwork is so good it looks real! Head over to Loretta's Custom Stitchery for more details and Stumpwork Instructions.


I love the boldness and brightness of this stylish purple stumpwork bird by Maison Bee on Deviant Art.


This cute deer stumpwork kit by Jane Nicholas Embroidery Kits  is one you could try for yourself.

All of these beautiful pieces of embroidery have reminded me of the Stumpwork kit I got ages ago, which I started but have done nothing on for months (if not longer) When it's finished it should look something like this

So far all I've done is the background leaf stitching and flower centre, and 1 1/2 petals, so it's probably time to free it from it's hiding and get stitching again.

Have you done any stumpwork? how was it?

You might also like
3D Cross stitch
All a Flutter Butterfly Treasury
Friday Finds: Sunflowers
Hardanger Finish: Purple Delight


Monday, 4 March 2013

Project Tutorial: Mothers Day Card

Naturally for Mothers Day next Sunday I had to design and make a card. With new stitch inspiration from my new Encyclopaedia of Stitches in the form of Rosebud Stitch, flowers were the obvious choice. It was easy to think of a slightly corny saying for the card. Besides, it might be corny but t's true, I wouldn't change my mum for anything! So here's the card I made, which you are more than welcome to reproduce for your own mum. Because it doesn't mention mothers day in the saying, you could use it as a birthday card for your mother too. I'm quite proud with the card, it's pretty easy and simple to make, once you've got the hang of all the different stitches!
 
Here's the chart I've developed. I stitched it using 2 strands of embroidery cotton for each colour, on 14 count pale blue aida using the DMC threads and beads stated below the chart, but if, like me, you have a stash of embroidery threads then just use whatever is too hand, or tailor it using your mums' favourite colours! The finished Chart size is approx. 3" (7.5cm) x 4" (10cm). Remember to cut the aida at least 2" bigger.


Writing: DMC 552
Basket: DMC420
Flower centres: DMC 445 (rosebud and spikey flower)
Flower centre, Daisy: Mill Hill yellow seed beads (can substitute with French knots in DMC 445)
Rosebud: DMC Colour Variations: 4180
Daisy: DMC Light effects 5200
Spikey Flower: DMC Perle 8 colour 99
Leaves/ Stems: DMC 320
 
How to Stitch:
 
Writing: Mostly Backstitch with some Cross Stitch
Basket: All Backstitch
Rosebud: Use Rose Stitch with a French Knot centre
Spiky Flower: Use Satin Stitch for the centre, with Backstitch petals ending in a French knot.
Daisy: Use Lazy Daisy Stitch for the petals, add a seed bead or French Knot for the centre.
Leaves: Use small Lazy Daisy stitch.
Stems: Use Backstitch for the Rose and Daisies, and Stem Stitch for the Spiky flowers.
 
Once you've finished stitching it, it should look something like this! From here on it's easy, all you need to do is trim down the cross stitch to the required size. (I left 5 squares either side and 7 squares above and below) and simple glue it onto the card, using either a clear drying adhesive such as PVA or double sided sticky tape. Just make sure you have glued down all the edges to prevent fraying.
As an alternative, you may wish to fray the edges, in which case leave an extra couple of squares all the way round after trimming the cross stitch down, and gently and carefully pull away the threads for those extra 2 squares. You can embellish the card or finish it in any way you want. Write your own personal message inside the card, and hey presto, you've made a simple embroidery mothers day card! She will love it as you have taken the time and effort to make it!

Tuesday, 26 February 2013

Stitch Tutorial: Rose stitch

One thing I find hard to do is small flowers. As I make lots of small cross stitch and embroidery pieces such as jewellery, I find it hard to stitch realistic flowers. Either they are very simple and too boring for the main work, or I struggle to create one that is detailed enough. I discovered this Rose stitch in The Encyclopedia of stitches, by Karen Hemingway, which I briefly reviewed in a previous post. It was exactly what I was looking for, and is the first new stitch I've tried from her book. The best bit? It's actually very simple to do and looks really pretty. But don't take my word for it, give it a go!

Rose Stitch can be used in many ways to add detail to many types of embroidery. Adjust the thread used depending on the fabric/ embroidery you are doing, for example if doing Crewel work use the same type of wool as you would for the rest of the embroidery. In the images below I have used 2 strands of DMC embroidery cotton on 28 count even weave.

Rose Stitch

Start with a French Knot to form the centre of the flower. You can either use the same or a different colour to the petals; I have used a yellow for the centre.

Using the coloured thread for the petals, bring the needle to the front of the work near to the french knot and make a single straight stitch, finishing with the French knot next to the centre of the straight stitch.  Now bring the needle back through about halfway along the first stitch, on the 'outside' of the straight stitch. Take the needle to the reverse of the fabric over the end of the first stitch, keeping the second stitch next to the French knot. Begin a third stitch from about halfway along the second straight stitch, and again end the stitch at an angle to create a web of stitches around the French Knot. Continue doing this to form a flower head. It will look a bit messy at first but keep going until you have reached the size flower you want.


It is also possible to replace the French knot at the centre for a seed bead, and stitch the petals around it. This gives a more obvious centre, but it does protrude slightly from the rest of the flower. Be careful that the first petal stitches go around the bead and don't slip under it to prevent it from popping out further. The idea is to surround the bead with the stitches so the centre is nestled amongst the petal stitches. I've finished off this rose with a couple of leaves, using lazy daisy (detached chain) stitch.


It sounds a bit complicated, but is actually really easy, so have a couple of practises and give it a go!

Happy Stitching!


You might also like
Project Tutorial: Embroidered Mothers Day Card
WIP: Peak District Photo Conversion
Friday Finds: Seaside
Aida Vs Evenweave
Sheftival Music Festival


Wednesday, 13 February 2013

Stitch Inspiration

As part of my birthday present from my parents I was given the Encyclopaedia of Stitches, by Karen Hemingway. For the last week or so it has been my 'breakfast reading' and is opening up a world of inspiration to me.


It is divided into several section, detailing the stitches used for certain types of embroidery. It begins as you would expect, with an introduction covering general information, before detailing several embroidery stitches. each section culminates in a project to help you learn the said stitches. While I want to learn the different stitches and techniques, (it includes bead work, shashia and shadow work) I like creating my own projects. However this book is excellent for project ideas and for inspiration. The pictures are fantastic with diagrams of how to create each stitch, and a photograph of the completed one. (sorry for the lack of photos from the book, my camera is no longer working).

It is definitely a book I would recommend to someone who wants to try different types of embroidery, I'm definitely going to take away new stitches and ideas and incorporate them into new projects, and hopefully tutorials. With a new laptop coming to replace my broken home computer, I just need to get a camera and find some time, and then I'll be well away!

Happy Stitching!


You might also like
Stitch Tutorial: Rose Stitch
Hardanger Finish: Purple Delight
Friday Finds: Science Geekery
Stumpwork Fancies
Apologies and Monochrome Projects

Wednesday, 5 December 2012

Tutorial: Embroidered Birthday Card

A couple of weeks ago it struck me that one of my favourite things to read on other crafty blogs is the tutorials, and yet I have written none myself!  So, I've decided to give it a go, please let me know what you think of it!

This tutorial will show you how to make an embroidered card, similar to this one. The card below is A6 size, and uses a blue ready folded card with a cut down smaller piece of pink card, onto which the design is hand embroidered.


Difficulty: Intermediate

Materials needed: card and envelope.
Extra piece of card (cut down to approx 2cm smaller than the front of the card)
Embroidery threads
Pencil
Needle
Tracing paper (optional)
glue (or double sided sticky tape


Step1:  Draw out your design. Practise it first on scrap paper until you are happy with it, then trace over the design using the tracing paper. Transfer the design onto the reverse of the small piece of card, ensuring that the design is transferred in reverse (the writing must be backwards). Alternatively free - hand draw the design onto the reverse of the smaller piece of card, but make sure that the lettering is all backwards. (This is the method I used). Your reverse of the small card should look like this.

Step2: Carefully embroider the design onto the card. The pattern is on the reverse side (opposite to normal embroidery, so that the pencil marks don't show up on the front of the card.) I used 3 strands of DMC embroidery thread for the flower, and 2 strands for the message. I used backstitch for the words, flower and leaf outline, Stem stitch for the flower stem and satin stitch for the flower centre. Note: be careful that the stitches aren't too small, as this could cause the card to tear. My backstitch were approx 1/2 cm in length on average. It also helps to stab the next hole required through from the reverse of the card, rather than the front of the card to ensure that the design is followed accurately. Please be very careful when stabbing the needle through the card, it is best to have some padding e.g a cutting board, behind it to prevent creasing the paper, or stabbing yourself with the needle. Once finished, the reverse will look something like this.


Step3:  Work out how you would like to position your design onto the per-folded card, (I did mine at a straight angle, but you could do yours at a diagonal to make the card look more jaunty). The apply glue or double sided sticky tape to the reverse of your design (I used double sided sticky tape as it's quicker), If using glue, I recommend a clear drying one, such as PVA. Hold above the card and slowly lower it into place. Press down to ensure it is firmly attached and allow to dry. Ta da! Finished!

Once you've given it a go once, then have a go at other designs and images!

Good Luck!


You might also like
Friday Finds: Seaside
The Clothes Maiden: Online Magazine Feature
Spring, Cambridge and Punting
Friday Finds: Sunflowers
WIP: Peak District Photo Conversion


Wednesday, 5 September 2012

Hardanger Finish!

A while ago I decided to try my skills at hardanger, an embroidery technique that involves leaving cut out squares. In my previous post Stitches past, I mentioned that I was busy working on Purple Delight, a kit which my sister gave me for Christmas last year. Having spend a lot of time designing and making jewellery and accessories for my Etsy Shop, I haven't had much time to fit in my own personal projects, but I am very pleased to announce the completion of one of them! What do you think?


It was nice learning new stitches as my experience is mostly with cross stitch and back stitch, but this piece encompassed embroidery techniques, such as the tulip, along with new stitches such as the Algerian eye and spider stitch. I really enjoyed working on this, and I love how the bead detail adds a touch of shine.


It was, however, fairly fiddly to cut out the even weave threads having completed the panel stitching around it. it would probably have been easier if I'd bought special hardanger scissors, rather than struggling and persevering with my embroidery scissors, but I am pleased with the effect overall.


The fabric I used was 22 count (stitches per inch) even weave, and this was the first time I stitched onto anything that wasn't Aida. As the cross stitches are over 2 threads it equates to an 11count Aida(the smallest I've worked on to date is 18count Aida). It has given me a strong desire to try a cross stitch piece on an even smaller count, and I'm currently considering whether to buy another kit or convert a photograph/picture to make my own chart.

The threads were also DMC Perle threads, rather than embroidery floss. They were thicker and spun in a way more similar to wool, although they were as smooth as embroidery floss. I really enjoyed working with new materials, stitches, and techniques. It has defiantly inspired me try out more new things!

Happy Stitching

You might also like
3D Cross Stitch
Friday Finds: Sunflowers
Stumpwork Fancies
Project Tutorial: Embroidered Mothers Day Card
Apologies and Monochrome Projects


Monday, 19 March 2012

Mothers Day!

Mothers day is a widely celebrated day, although the actual day varies worldwide. It is a day when motherhood is celebrated, along with the maternal bond that is so important to all of us.

I hope that mothers everywhere had a lovely day yesterday, hopefully being treated and pampered, and just told how much we children love our mums.

I didn't see mine as she lives about 2 1/2 hrs away, and as we don't have a car (and i had to work in my day job as a cell biologist this weekend) I couldn't go, but I am visiting this comeing weekend, which I'm really looking forward to, especially as she's thinking about cooking a whole salmon! delicious!

Although I wasn't there, I did find time to make a card for her (I had to wait to write this blog as I dodn't want her to get a sneak preview!). I was inspired by the blog of a fellow crafter, Bugs and Stitches by Lupin, in her tutorial on making these fabulous flower brooches.


My first thought was that looks good, my second I could do that, and my third, that looks easy. In hindsight, my first thought was, is and will remain true, my second is a possibility (if I took enough time and had plenty of practise) and my third.... well, not so easy as you'll see.

To begin with, I cut smaller flower shapes out of felt, along with some leaf shapes, and thin strips to use as stalks. As I used a design of 5 flowers, and it's only a small card, I didn't layer them up as Lupin has. Instead I stitched  a flower centre in various ways, such as french knots, embroidery, and an algerian eye. I also stitched veins on the leaves.


I then positioned them on the card, before gluing them on carefully using a clear drying craft glue. I left this overnight to dry, and then as I didn't have much time and had to post it on my way to work, I quickly wrote on it 'To my marvellous mum'. Here is the finished design.


It's not bad, but I've got a long way to go to produce anything as lovely as Lupins felt designs, so I might just leave it to her! You can buy a variety of lovely felt items on her Lupin handmade shop, as well as felt squares and craft supplies in her felt shop. if you fancy making a beautiful felted card then check out her newest tutorial which was only posted today. It puts my efforts to shame.

I hope my mum likes is though, and she defianately is marvellous, so Happy Mothers day to my marvellous mum!

My sister, mum and me!