As it's the festive season I've got a little present for you, a Mum cross stitch bookmark with Roses. It makes a lovely gift, mum's in particular always appreciate something that you yourself have lovingly spent time making for them. Even better, This design can be stitched in a variety of different colours; I have made a pink one, yellow one and purple one for various people to give to their mum as a present. If you've never tried cross stitch before, you can find a tutorial here.
What do you think?
The finished bookmark is 2"x7" (5cm x 18cm) approx with the tassel as extra. It was stitched onto a 2" wide 14 count Aida band, available from a range of suppliers (I tend to use sew and so but there are plenty of others). I have used 2 strands of DMC threads for the stitching, and you will be pleased to know that only full cross stitches are used, making it perfect for beginners. Here's the chart in colour symbols.
Simply print out the chart and start stitching!
Happy Stitching
You might also like
Personalised and Proud
Friday Finds: Mothers Day
WIP: Peak District Photo Conversion
Project Tutorial: Embroidered Mothers Day Card
Fridy Finds: New Sheets
Brr. This morning there was freezing fog, black ice, and frost. Now it's slightly warmer the ice has thawed, but it's raining cats and dogs. Nasty. I'm most definitely looking forward to spending a cosy night in, I may even light the gas fire for some extra warmth and cosiness.
The cold weather has, however, given me this week's theme, Christmas ice, so have a last peek at Christmas gifts and the pretty side of cold weather.
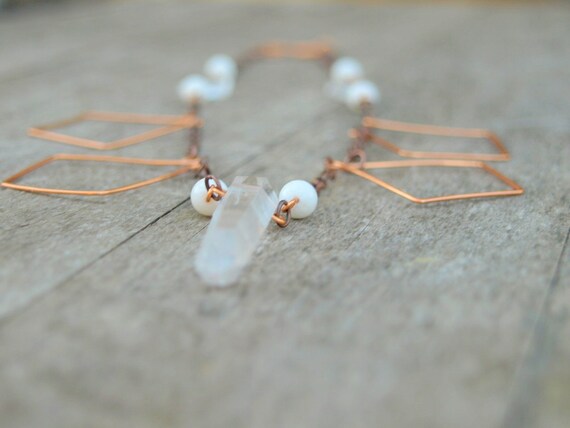
Shalotte's gorgeous necklace reminds me of an icicle. She has used vintage and handmade beads to create this stylish copper wired necklace, perfect for adding a little frosting.
If you're still looking for some Christmas decorations then head over to Aisling Designs for this bright bunting, with some cute snowmen friends.
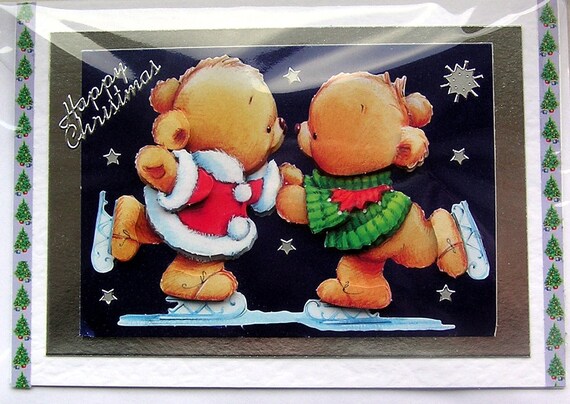
This ice skating teddy bear couple Christmas card is absolutely adorable. I love the touch of sparkle and the fun and cute romance it encompasses. If you agree, then head over to Sunny Crystals for a better look.
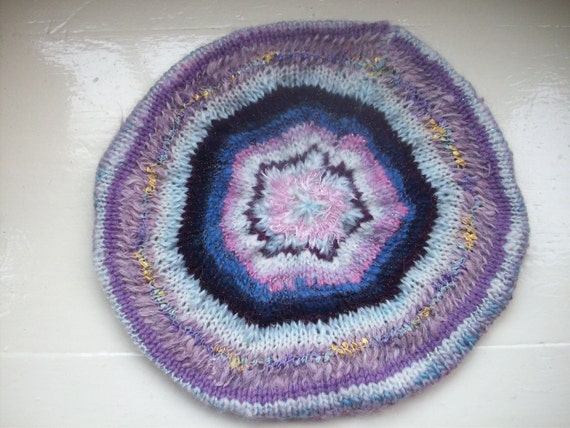
This hand knitted beret by Spinning Streak reminds me of the slices of rock that you can get. I loved looking at them as a child, and have a few at home. The colours of this one are a perfect match for wintry weather too.
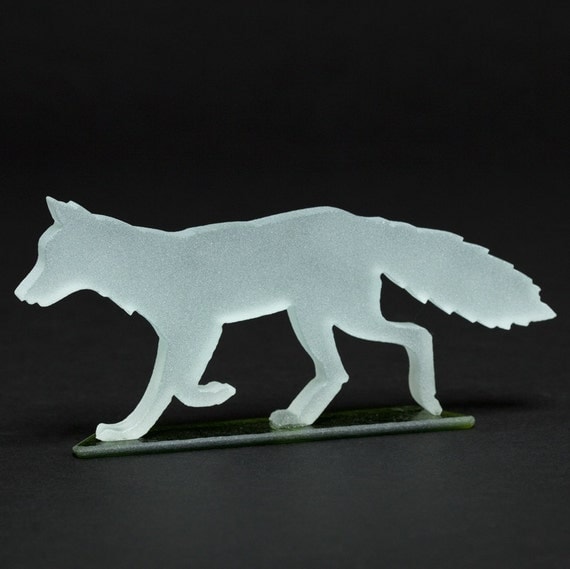
If it's icy items that take your fancy then head over to flying cheese toastie and take a look at this frosted glass fox sculpture. He looks cool as he struts his stuff, and would make an elegant gift for the man in your life.
Jack Frost's painting is so pretty, especially on a crisp winters morning. Be inspired to wrap up warm and venture out in the cold thanks to this beautiful Frozen Morning print by Purple face.
Happy Shopping!
You might also like
Friday Finds: Christmas Cheer
Treasury Tastic
Cupcake Decorating
Friday Finds: Calenders
Christmas Earrings
About 6 weeks ago I finally finished converting this lovely photo, taken at Langsett river in the Peak District, into a cross stitch.
After lots of editing (to trim down the number of different colours to a meagre 44 colours) I finally ordered the 27 count (27 stitches per inch) even weave and a lot of threads.
As you can see, I've got quite a lot of stitching ahead of me. I wanted a big embroidery project, and I've definitely got it. In the 6 weeks since starting the cross stitch I've only manage a small corner of the sky, completing approx 1/4 of the first page of 15! I have been busy with a few other projects (for Christmas presents, so you'll have to wait to see them). I'm looking forward to reaching the bank so I can start using some greens. Anyway, here's my progress so far, what do you think?
With all that in mind, to have any hope of finishing this by next Christmas I'd best get stitching...
Happy Stitching
You might also like
WIP: Shh Now
3D Cross Stitch
Friday Finds: Monsters
Subversive Cross Stitch
Stitch Inspiration
Christmas is a celebration, it's a time to be happy and joyous, and give happiness to one another. When it's cold and dark and rainy and miserable we need all the cheer and happiness we can get, why else did the Pagan's have a mid winter feast? We need something to look forward to and enjoy. Something to cheer us up, and there are plenty of lovely things to help us spread the Christmas Cheer!
Keep you're message simple with this beautiful card by Mee Mees Creations. I love the patterned background and the boldness of this card. It will definitely stand out amongst those winter scenes and Christmas pictures.
You won't miss this embroidery design by Crafty Jacky once it's sewn onto a Christmas outfit. It's perfect for anyone who likes to shout long and loud about the joys of Christmas, spreading merriness along the way.
Little Gem Girl have designed and made this cute little Christmas pendant, so if you like being a bit of a Christmas elf, it's perfect for you! Even better, She had a buy 3 get 1 free sale on, so head over and check out her other fantastic pendants!
You can't have Christmas cheer without a toast, and with these elegant hand painted champagne flutes by hand painted petals you will be finding every excuse to celebrate some Christmas cheer!
We all celebrate Christmas by giving gifts, but Christmas is the only time when those gifts are displayed prettily under the tree. Add some gorgeous vintage cheer with these beautiful gift tags by Anista Designs.
Make your Christmas gold star standard with this cute wooden star decoration by Sophies Cupboard. It will look perfect anywhere, on a tree, a wreath, or even a present!
Happy Shopping!
You might also like
Beads Galore
Friday Finds: Knitwear
Project Tutorial: Bicycle Card
Friday Finds: Christmas Food
Shake Rattle n' Roll Charity Night Crafters
A couple of weeks ago it struck me that one of my favourite things to read on other crafty blogs is the tutorials, and yet I have written none myself! So, I've decided to give it a go, please let me know what you think of it!
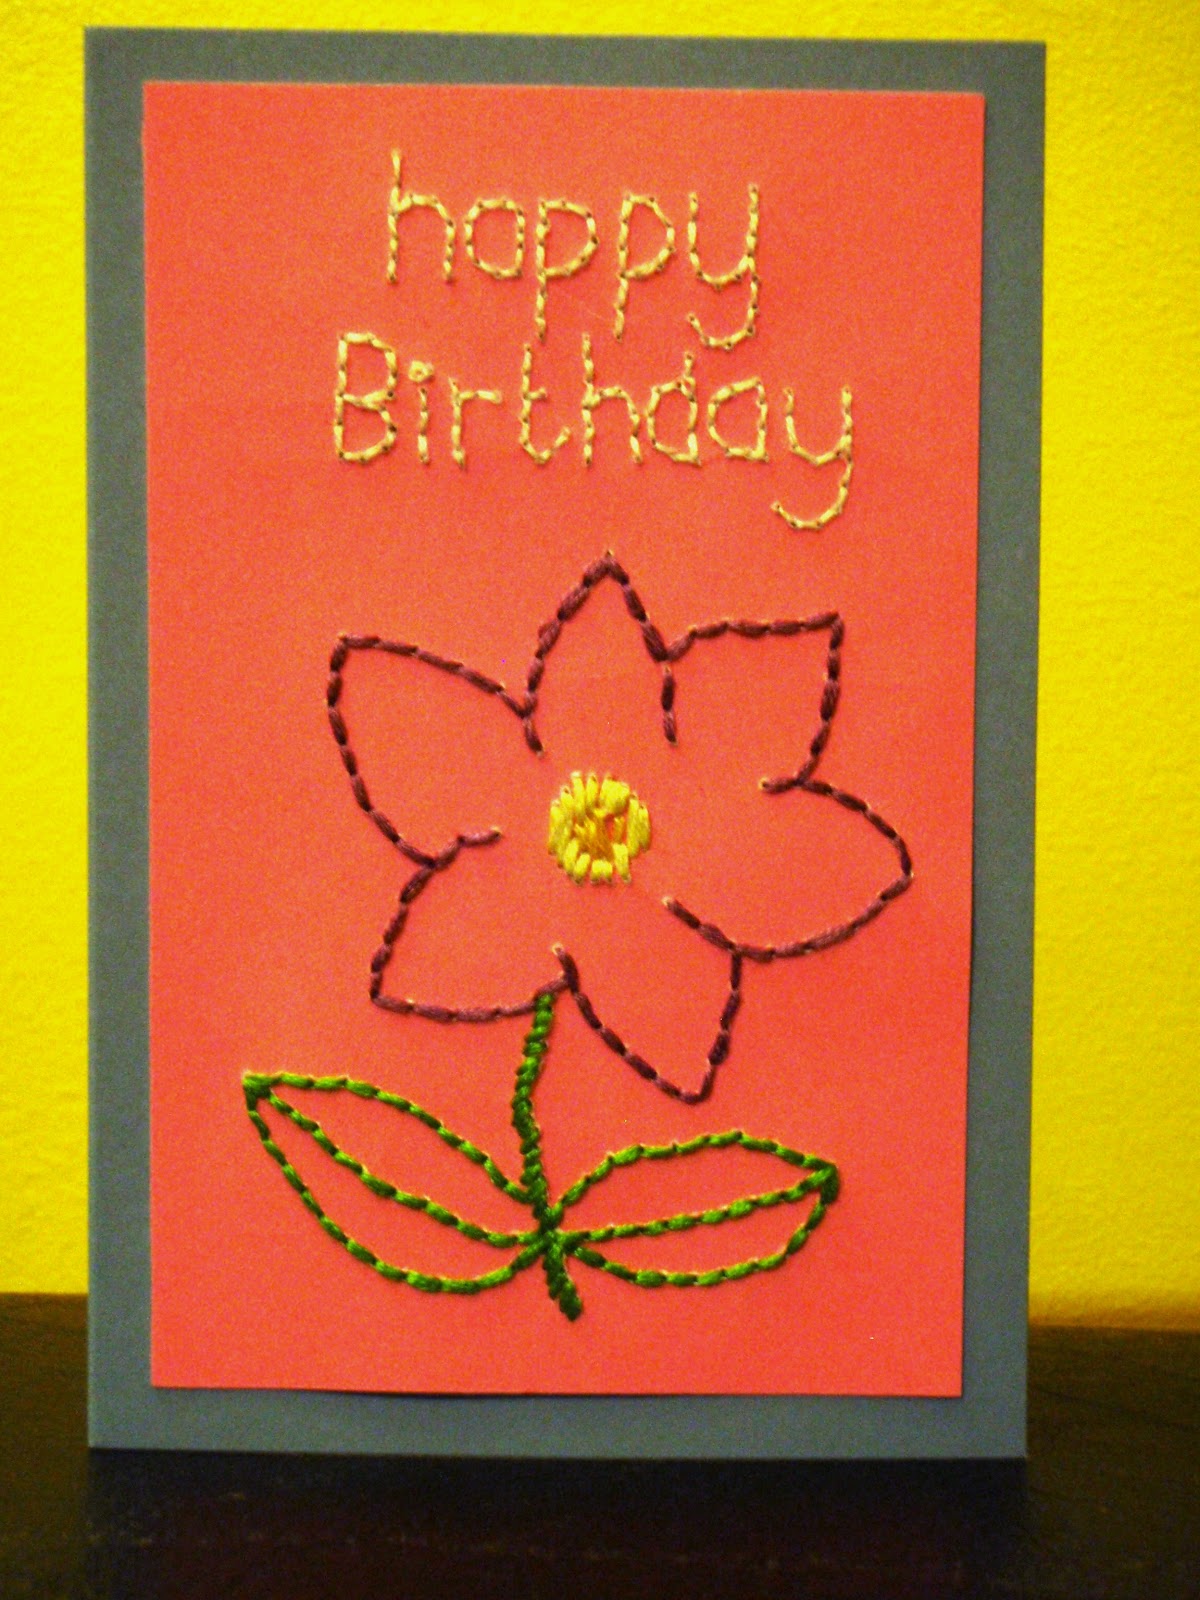
This tutorial will show you how to make an embroidered card, similar to this one. The card below is A6 size, and uses a blue ready folded card with a cut down smaller piece of pink card, onto which the design is hand embroidered.
 Difficulty: Intermediate
Materials needed: card and envelope.
Extra piece of card (cut down to approx 2cm smaller than the front of the card)
Embroidery threads
Pencil
Needle
Tracing paper (optional)
glue (or double sided sticky tape
Difficulty: Intermediate
Materials needed: card and envelope.
Extra piece of card (cut down to approx 2cm smaller than the front of the card)
Embroidery threads
Pencil
Needle
Tracing paper (optional)
glue (or double sided sticky tape
 Step1: Draw out your design. Practise it first on scrap paper until you are happy with it, then trace over the design using the tracing paper. Transfer the design onto the reverse of the small piece of card, ensuring that the design is transferred in reverse (the writing must be backwards). Alternatively free - hand draw the design onto the reverse of the smaller piece of card, but make sure that the lettering is all backwards. (This is the method I used). Your reverse of the small card should look like this.
Step2: Carefully embroider the design onto the card. The pattern is on the reverse side (opposite to normal embroidery, so that the pencil marks don't show up on the front of the card.) I used 3 strands of DMC embroidery thread for the flower, and 2 strands for the message. I used backstitch for the words, flower and leaf outline, Stem stitch for the flower stem and satin stitch for the flower centre. Note: be careful that the stitches aren't too small, as this could cause the card to tear. My backstitch were approx 1/2 cm in length on average. It also helps to stab the next hole required through from the reverse of the card, rather than the front of the card to ensure that the design is followed accurately. Please be very careful when stabbing the needle through the card, it is best to have some padding e.g a cutting board, behind it to prevent creasing the paper, or stabbing yourself with the needle. Once finished, the reverse will look something like this.
Step1: Draw out your design. Practise it first on scrap paper until you are happy with it, then trace over the design using the tracing paper. Transfer the design onto the reverse of the small piece of card, ensuring that the design is transferred in reverse (the writing must be backwards). Alternatively free - hand draw the design onto the reverse of the smaller piece of card, but make sure that the lettering is all backwards. (This is the method I used). Your reverse of the small card should look like this.
Step2: Carefully embroider the design onto the card. The pattern is on the reverse side (opposite to normal embroidery, so that the pencil marks don't show up on the front of the card.) I used 3 strands of DMC embroidery thread for the flower, and 2 strands for the message. I used backstitch for the words, flower and leaf outline, Stem stitch for the flower stem and satin stitch for the flower centre. Note: be careful that the stitches aren't too small, as this could cause the card to tear. My backstitch were approx 1/2 cm in length on average. It also helps to stab the next hole required through from the reverse of the card, rather than the front of the card to ensure that the design is followed accurately. Please be very careful when stabbing the needle through the card, it is best to have some padding e.g a cutting board, behind it to prevent creasing the paper, or stabbing yourself with the needle. Once finished, the reverse will look something like this.
 Step3: Work out how you would like to position your design onto the per-folded card, (I did mine at a straight angle, but you could do yours at a diagonal to make the card look more jaunty). The apply glue or double sided sticky tape to the reverse of your design (I used double sided sticky tape as it's quicker), If using glue, I recommend a clear drying one, such as PVA. Hold above the card and slowly lower it into place. Press down to ensure it is firmly attached and allow to dry. Ta da! Finished!
Once you've given it a go once, then have a go at other designs and images!
Good Luck!
You might also like
Friday Finds: Seaside
The Clothes Maiden: Online Magazine Feature
Spring, Cambridge and Punting
Friday Finds: Sunflowers
WIP: Peak District Photo Conversion
Step3: Work out how you would like to position your design onto the per-folded card, (I did mine at a straight angle, but you could do yours at a diagonal to make the card look more jaunty). The apply glue or double sided sticky tape to the reverse of your design (I used double sided sticky tape as it's quicker), If using glue, I recommend a clear drying one, such as PVA. Hold above the card and slowly lower it into place. Press down to ensure it is firmly attached and allow to dry. Ta da! Finished!
Once you've given it a go once, then have a go at other designs and images!
Good Luck!
You might also like
Friday Finds: Seaside
The Clothes Maiden: Online Magazine Feature
Spring, Cambridge and Punting
Friday Finds: Sunflowers
WIP: Peak District Photo Conversion